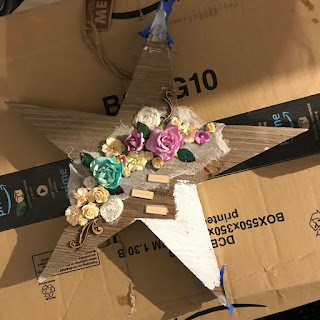
Here's how I turned one of the gorgeous wooden 'mix the media' stars from Jillibean Soup into this mixed media vintage shabby chic style decoration!
Firstly- my star was a little damaged. It was the last one on Amazon, so I opted to fix it instead of sending it back- I was so excited waiting for it, that I knew I could make it work!
I fixed the broken area on the very top point using high density modelling paste, which I slowly built up whilst working on the rest of the star.
you will also have to forgive my work area- I'm currently not set up to do mixed media projects on my desk, and opted instead to work on top of the box the star came in- that way once it is too covered in paint and ink, it can be recycled, and my desk doesn't get damaged!
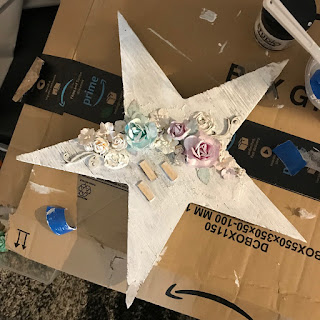
I firstly created a sketch of what I planned to do, then arranged some of my Wild Orchid Crafts paper flowers , snipped off the wires and glued them down with multi medium matte on top of a strip of cheesecloth.
I chose some of the Jillibean wooden words 'create', 'happiness' and 'today'
and glued those down too. I also added some MDF swirls from Samantha K crafts coming out from the edges of the floral arrangement.
I then started to add gesso to the entire star- starting at the outside and working in - I did it in this order so that the gesso on the outside would be dry when the glue at the centre was dry and ready to be covered too.
I worked my way in, coating all the flowers in gesso too, leaving the wooden words uncovered. later in the process I masked them off to avoid getting spray ink on them.
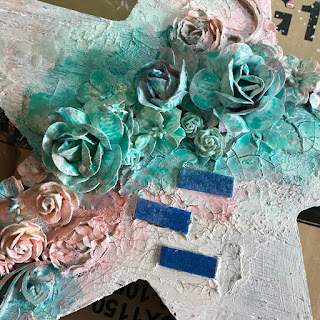
once the gesso was dry, I stencilled some flowers using texture paste and a tim holtz stencil at random areas on the points, and also added crackle paste - again, sporadically, focussed mainly around the flowers , and swiped it on the points randomly- both on the top and the sides.
once the crackle paste was dry. the texture was really starting to show!
I then pulled out some watered down acrylic paint and one of my distress paints, and dabbed them around the flowers, wiping off most of it just to leave a thin coat.
I then went in with my prima color bloom sprays in soft teal and cotton candy, making sure to spray it just over the area where the flowers were.
one of the final steps was to pull out my deco art antiquing cream in antique grey, and coat the areas of the star that were still white.
it looks pretty scary when it is covered, but provides the most wonderful effect once it has dried, and you start to wipe it off. It remains in the cracks and places you don't buff.
as you can see, I wiped it back to leave a lot of white areas .
the very final step was to add creative expressions gold gilding polish to some areas I wanted to highlight- some areas on the flowers, the texture paste flowers, and along all the edges.
Finally, a finished project, and one I am totally in love with!
the finished star
close up of the centre
I hope you enjoyed seeing how I made this mixed media star, and if you have any questions, I'll be happy to answer them!


Gorgeous star project in lovely colours. I loved seeing the photos you took while creating it.
ReplyDeleteGG
thank you Gwyneth! I do like to try and take photos, especially when videoing hasn't been an option. hopefully that is going to change very soon!
Delete